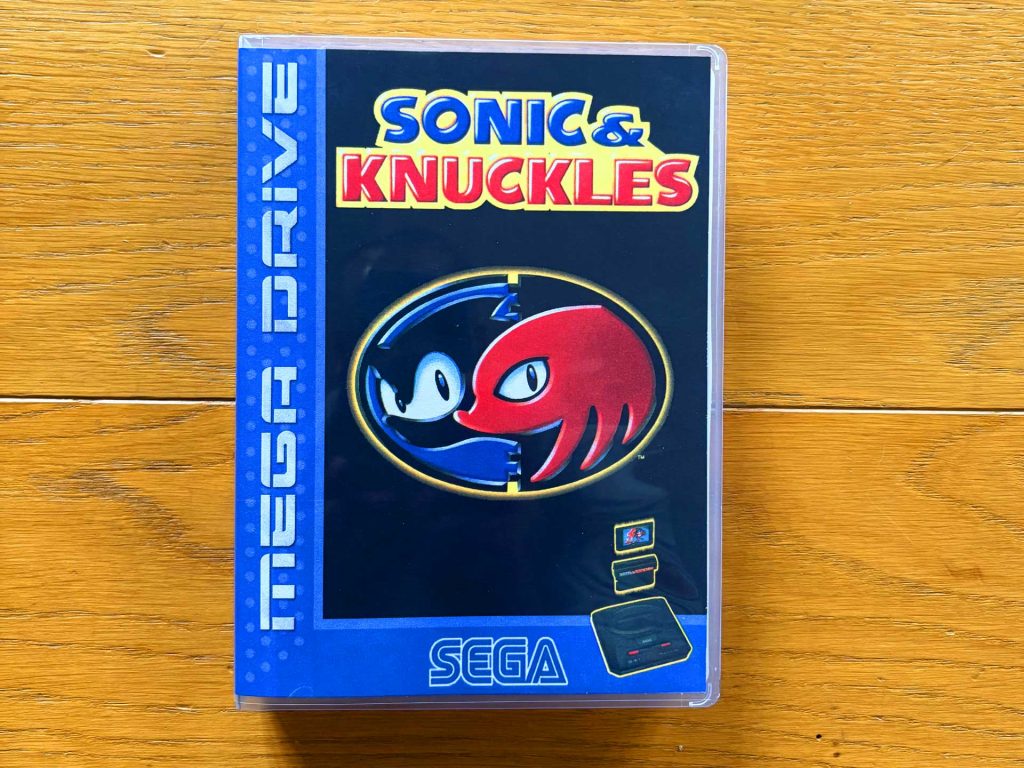
Many titles back then were shipped exclusively in cardboard boxes. Decades later, well-preserved original packaging is rare, expensive, or simply no longer available. The solution? Universal Game Cases (UGC) combined with a custom cover!
Why a Custom Cover

Because the original cardboard packaging of early console games used completely different form factors than modern universal cases or DVD boxes, original photos or scans of the old packaging usually can’t be used one-to-one for a new cover insert. The differing dimensions and proportions often cause important elements to shift, get cut off, or simply no longer fit the layout. That’s why a newly designed, precisely adapted cover version is necessary in order to present the game cleanly and attractively in an alternative case such as the popular Universal Game Cases (UGC).
The advantage is obvious: with a tailor-made custom cover, your collection not only looks uniform and modern, but also stays authentic and faithful to the original style. On top of that, you have the freedom to design every detail according to your own preferences from artwork, logos, and color schemes to the spine layout and the back cover. This way, you create a case that fits your game, your taste, and your entire retro collection perfectly.
Step by Step: Creating Your Own Custom Cover
Step 1: Download the Template
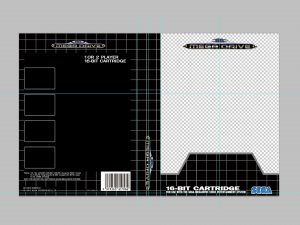
On The Cover Project you can find templates optimized specifically for Universal Game Cases, as well as many other case types, usually in PSD format. These include exact dimensions, clearly defined areas for the front, spine, and back, as well as helpful guide lines.
Download the template you need and open it in Photoshop or GIMP to get started right away.
Step 2: Artwork and Logos
In the next step, gather all the materials you need: cover artwork, game title, logos, screenshots for the back, manufacturer emblems like the “Nintendo Seal” or “Sega Quality” badge, and any other graphical elements. Many of these resources are already available in high quality on The Cover Project, so you won’t have to spend much time searching and can start working directly with top-tier material.
Step 3: Design the Layout

Now comes the creative part. Start by placing the main artwork, the title, and any additional graphics on the front cover. On the spine, you’ll want to position the system logo, the game title, and possibly a small symbol or mini-logo. The back cover offers space for screenshots, short descriptions, features, and decorative elements. For an authentic design, feel free to take inspiration from old Japanese, US, or PAL boxes they often provide excellent layout ideas.
Once everything is in place, it’s time for a thorough check: Are all elements within the print area? Is the text easy to read? Do the colors feel balanced? This is also the perfect moment for small refinements such as adjusting contrast, correcting colors, or sharpening individual graphics. If you don’t want to start from scratch, The Cover Project offers a huge selection of lovingly crafted finished covers. You can download them, drop them into your template, and customize them as you like, perfect for achieving high-quality results quickly.
Step 4: Printing & Trimming
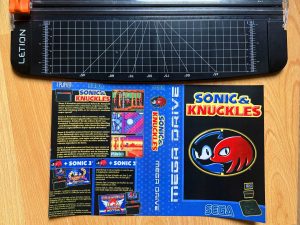
Print the finished cover at 100% scale (no resizing) and select the highest available print quality so that colors and details come out as clearly as possible. After printing, let the sheet dry for a few minutes to prevent smudging.
Next comes the crucial step: trimming. It’s best to avoid using scissors no matter how steady your hand is, the cut will rarely be perfectly straight. For a truly professional result, use a craft knife or, even better, a metal-edged cutting ruler. This allows you to achieve perfectly straight edges and clean cuts without fraying or shifting lines.
Step 5: Inserting the Cover into the Universal Game Case
Finally, slide the precisely trimmed cover into the transparent outer sleeve of the Universal Game Case, and in no time your game will be presented in a new, perfectly fitting case.